How to Restore a Remington 870 Shotgun (Rust Bluing)
Rich Lynch was very kind to write a how-to article about restoration of a Remington 870 Wingmaster shotgun. I am more than happy to share it with you:
“Brilliant. I’ve just bought 3 kilograms of rust, with a lump of wood on the end” I said to myself as I opened up the bundle that’d just been handed to me, wrapped up in an old dirty bathroom towel.
I’d been keeping an eye out for a restoration project for myself for a while now, and when I was offered a 1954 Remington 870 Wingmaster for next to nothing, I jumped at the chance. It was sold as “old, beaten up, put away wet and rusted to hell.” That sounded a little like me after a heavy night on the town, but for that price, I was keen to give it a go.
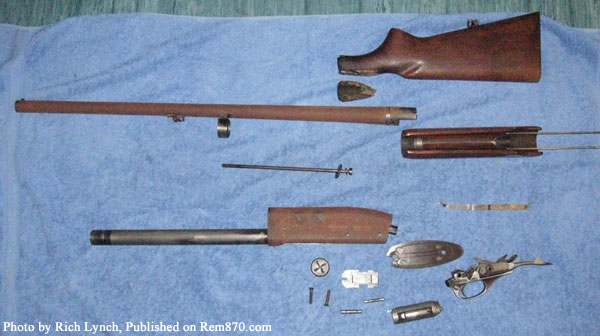
Rusty Remington 870 Wingmaster
As I opened up the gently clanking package, I was really rather shocked. I’m the first to admit that I’m a little strict about my gun cleanliness, and what I was presented with made me sob a little. All I could see was rust. Red-ish-Brown, rust pitted metal.
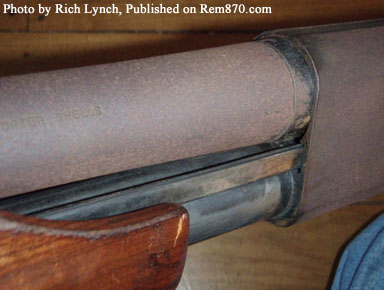
Rusty Remington 870 Wingmaster
The first job was to take her down to bare metal to see how bad she was. A 30mins soak in a tub of malt vinegar, followed by a scrub with a wire brush, repeated as necessary, took the rust off in no time. It literally fell away from the gun, leaving a clean grey metal. A little pitted, but evenly so, giving the surface a not unpleasant texture. I then rinsed her off with water, and let her dry in front of the fire. The metalwork was then prepped with 400grit wet&dry paper.
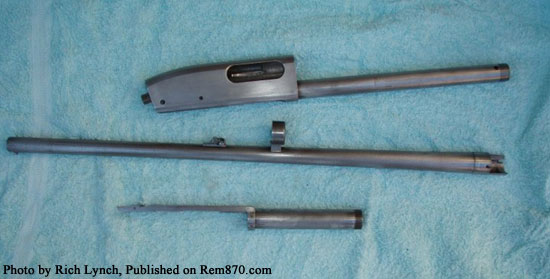
Remington 870 Wingmaster
Next, re-bluing. Yes, I know that there are a lot of great methods out there for coating your gun in this day and age. Hot-Bluing dip, baked-on-Duracoat, various milspec coatings etc. But these methods just didn’t seem right for the old girl. So I looked into the age old method of rust-bluing. Not to be confused with the modern methods of bluing metal that a lot of gunsmiths use these days, this was the ‘original’ method of bluing, and browning, guns throughout the centuries. It’s described as taking a lot longer, being much trickier than the new types of bluing, but the finish was prettier, and if done properly, would last a lot longer. The idea of ‘protecting my shotgun from rust, by using a layer of rust’ was rather interesting one.
There are plenty of products available for Rust Bluing; ‘Pilkington Classic American Rust Blue’ and ‘Laurel Mountain Forge: Barrel Brown and Degreaser’ are a few of the better selling ones available from The States. You wipe a thin film of the acid-mixture onto the metal work, and actually encourage the rust crystals to form by putting it somewhere moist. Shower rooms full of steam are a quick and lazy way to do this if you want to speed this step up, just be careful not to over do it. Yes, you’re purposely rusting your own gun. It’s a strange, nervous feeling deep down in the pit of your stomach. What you’re trying to achieve is near 95% surface rust. Any more and you risk the rust going too deep into the metal. Once this thin surface layer has formed, you then boil the metal part for 10-20mins in distilled water, or rainwater. This coverts the rust to a black rust or ‘ferro-ferric oxide’. A lot of town tap-water will not have such a good conversion effect. Latex gloves are a must – grease from fingerprints on the metal will not help rust to form, as well as a healthy paranoia about what may be in the rusting solution you’re using.
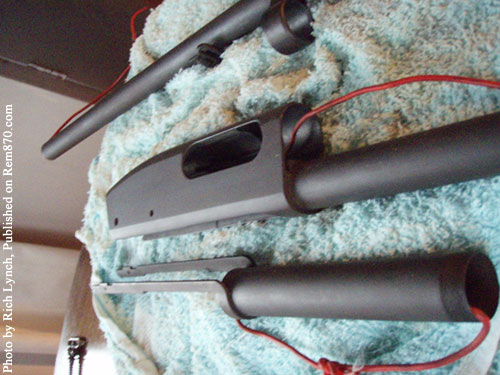
Rust Bluing Remington 870
Finding a container big enough to boil a gun barrel isn’t an easy task, and walking into your local restaurant and asking them if they’d mind you using their kitchen to boil your shotgun isn’t likely to be met with much understanding. Luckily though, pouring boiling water over the parts in a tub is enough. 10mins of pouring a repeatedly boiling kettle and 3 pans of water from the kitchen hob over the metal work resulted in a deep black colour. ‘Carding’ the surface smooth with 0000 wire wool then takes off any excess, and smoothes out the finish. Wipe the parts down with nail polish remover to remove dust and any grease, and repeat the AcidSolution-Rust-Boil-Card cycle. Care must be taken when re-aplying the solution as it will actually strip off some of blue that you just carefully put onto the metal if you wipe over a patch you’ve already wetted. Smooth, single wipes with a cotton bud, and don’t be tempted to go back for any small spots you’ve missed – you’ll get them in the next coat.
Each cycle, the colour of the bluing will get darker and deeper. Different metals will react differently of course – the old soft shotgun metal on the Wingmaster only took 5 cycles before it was noticeable that she was very reluctant to form any more surface rust. I’ve been told harder steel may take up to 8 cycles. If your gun refuses to rust when coated in acid, that’s a pretty good indicator that you’re headed in the right direction. A long soak in hot water and baking soda to neutralise any acid and stop further rusting is the final step to this stage.
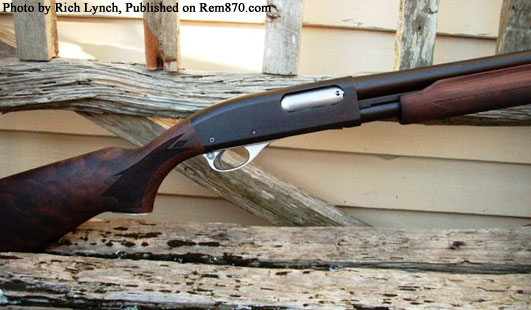
Remington 870 Wingmaster
The final stage is oiling. Apply a very generous amount of Boiled Linseed Oil (great for wooden stocks as well) onto the metalwork with a rag, and let to sit for a few hours, before wiping down well. The residue should then be baked into the metal – 150degC for an hour. Once cooled and wiped down, do the same with mineral oil, 120degC for an hour. A big gas BBQ with a temp gauge was perfect, although a larger kitchen cooker would be fine. Note: It is vital to ensure that your wife is out for the day before attempting this, otherwise you risk unwelcome side effects.
The finish came up a very even, deep black. When out in the sun, there’s a slight blue tint which adds a depth to the finish. To go with her new colouring, a new stock was bought from Remington, along with a new sight-bead. The trigger guard polished up to a dull silver.
And that, it a classically Rust Blued shotgun, with a baked in oil finish. A regular wipe down with your favourite gun oil will be enough to keep her looking good for decades to come.
| Get Rust Blue on Brownells |
Related Post:
10 Best Home Defense Upgrades for Remington 870
Remington 870 Non-MIM (Machined) Extractor
5 Best Aftermarket Stocks for Remington 870


Talk about a twofer. Pictures of a newly restored shotgun in one article and then the detailed steps it took to restore it in the next. Great work Rich!!
jon
Rich,
Thanks for the extra in-depth report on your 870, I learned a great deal from it. I would love to find a Wingmaster like this to do the “re-birth” to it.
Thanks again for your time writing this up.
Tim
Outstanding job, and excellent article. I was just going to do some coating to mine as it is all worn, but now I may have to do this instead. Wow!!
-Mark
I just got done doing a slow rust bluing of remington 870 shotgun this weekend its 1973 model the only problem i had was the ring on the barrel that slips over the magazine tube never really took any color even after 8 cycles. got any advise?
Yeah Dan, that was the one part that didn’t want to rust for me either. It’s a different type of metal to the rest of the gun. I managed to get bluing to form eventually. Maybe try a few cycles where you’re just rusting that part… maybe use a bit more solution, and use shower-room steam to really get the rust going.
Then again – if you can’t get it to rust with acid… maybe just polish her up and have her grey metal.
Be keen to see some pics when you’re done!
Hey, where can I get a remington in this condition, I would love to try what is done in this article here. The gun should be cheap, but is the procedure ( the materials, etc ) expensive ultimately?
Thanks for any replies! this sounds like a supremely fun endeavor!
I was keeping an eye out for one like this for a few months before i came across one. Really cheap to buy as the owner usually just wants it gone.
As for all the ingredients… VERY cheap. The most expensive part is the bluing solution, and mine was us$10 (Laurel Mountain Forge Brown&Degreaser), with another $10 for shipping overseas. if you’re really keen, you could always find a home made recipe for the bluing solution online and make it yourself. I wasn’t quite that brave!
Amazing story.
Absolutely love it. Very impressed. Love the silver colored trigger guard as well. Fantastic job on this gem. I own 2 older wingmasters and use them regularly. When I finally wear the blueing off I do plan on trying this method. Thanks for sharing!
Good post, Rich. My son and I spent Father’s Day restoring one of my father’s old Remington 870. This tutorial was a great guide for us.
It’s so bad that some people don’t really take care of their weapons! I mean, handing it over in an old, dirty bathroom towel! Come on! Couldn’t he just clean it a bit? You had your work cut out for you and I’m glad you did because of what you shared here with us. Thanks for your hard work and for the pictures!
Gentleman, I just thought that I would throw it out there that there are still deals out there. I just picedk up today a 1955 Rem 870 Wingmaster today old & crusty, but tight & unmolested in a pawn shop for $104.00! It is in better shape than the one that was in the above article. I bought it with the intent to cut it down & bomb it flat black for home defense, but after reading the restoration article & seeing how nice the gun turned out I am having second thoughts. Thanks for the article/
Great job on the restore and rust bluing. I am looking to attempt this on my next purchase. I am wondering. Will this process cover up all the etchings like serial model number and such?